Tuesday, January 29, 2013

FREEBIE!!! DESK MAKEOVER

I LOVE WHEN I FIND PERFECTLY GOOD PIECES ON THE SIDE OF THE ROAD!!!


I get so excited when I can get something for FREE!!  A friend of mine told me that she saw a desk on the side of the road in her neighborhood.  After a visit to her house, we went to see if it was still there.  YAY, it was!!  We quickly scooped this up and put in the back of my SUV!  My daughter has been wanting a desk for her room, so I thought this would be perfect for her!  
<----- the before...  I had already begun to sand and forgot to take a pic before I started.


Sanded, primed, and 1st coat of this cute color....Rose Dust (valspar, semi-gloss)


 The lighting in these pics make this color look a more purplish, but it is really more pink!


 After I painted 2 coats with a brush, I saw too many brush strokes...  I had forgotten to sand in between each coat.  That really does help!!  So I turned to my handy dandy electric sander and went to town!  After sanding, I used a foam roller and applied a 3rd coat.  This time.... much smoother finish!  HAPPY!  I still have a few touch up areas on the top where I sanded a little too much.  But all in all,  it looks so good!  


 I am in LOVE with this hardware I purchased at Lowes.  It's called Circus drawer pulls at about $3.50/each!  

 The bottom area of the desk needs to have some shoe molding applied and as soon as I can miter the edges, it will be painted and put on!  I tried to use one of those miter boxes and hacksaw from Lowes and it was almost impossible.  I guess my molding was a little too big for it making it difficult! I need a miter saw!!!
This has really been so much fun to paint!  I love bright paint colors, and my daughter can't wait to get this in her room!

TOTAL COST... ABOUT $30!

Friday, January 4, 2013

Paint project submitted!!

I submitted my paint projects to one of my favorite blogs and it got posted yesterday!!

Exciting!!!  click on the link below to check it out!!


Dresser RE-DO for my laundry room

Another Great FIND!

I found this gem on Craigslist and had to have it! I have been looking for a unique piece to put in my laundry room.  I wanted something with some character and fun lines! This dresser has a curvy front and horizontal slats on the side, and little keyholes on each drawer.  I can't wait to paint this!!!

Using a DIY recipe for chalk paint, ( from iheartnaptime.net) I decided on Aspen Gray by Valspar. 


1st coat of chalk paint... I only sanded the top of the dresser and did not prime!  That's the beauty of the chalk paint!  


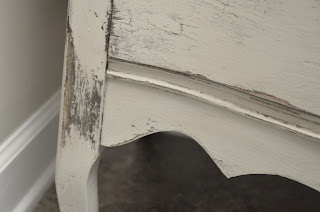
After the second coat is dried, the distressing begins!  This also de-stressing ME!  HAHA!!  


I wanted to try something new with this piece, so in the areas that I distressed the most, I applied a crackle medium.  Let that dry for a little more than an hour, then apply a coat of paint over it. Be careful though, brush the paint over the crackle medium only once.  More than one brush over with mess it up!  It only takes a few minutes and the crackle starts to show!  This is awesome!  And a word of advice from experience... if you applying the crackle to the side of something, make sure you put that side UP.  It will turn out so much better! 


Doesn't this look GREAT?!  
I love it.  
I haven't added the drawer pulls yet, but those will be spray painted black.