Showing posts with label distressed. Show all posts

Thursday, July 31, 2014

Ornate small desk!

I purchased this fabulous little desk for a  who was looking for something small! I sent her a picture of this one and it was perfect for what she wanted!! There is so much detail and some serious spindled legs which I love! A pain to paint but the end result is always worth it!! 
The before pic... 
 
My customer wanted a black desk with turquoise showing through! After some painting, distressing, and waxing, here it is... Beautiful!!!
It came so nice and the customer LOVED it! I also replaced the existing knob with a pretty glass knob!

I love two toned pieces, it gives it a little something extra! 

Thanks for reading and happy painting!! 
~Amy 


Wednesday, July 16, 2014

I love Glaze!!!

I am working on a coffee table today with a lot of detail so I thought it would be the perfect piece to show how to glaze!
 If you are using chalk paint, you would apply the glaze after clear waxing just like if you were using dark wax. 
If you are using latex paint or milk paint, you can glaze away without needing a clear coat first. Then after you are all glazed and dried, you should seal your piece! 
I painted 2 coats of a shade of white I bought at Lowes. Distressed all the edges! 
One of my favorite products is Valspar's Antiquing glaze in black. I paint it on using a chip brush working in small sections. 
Using a clean rag or paper towel, start wiping! The nice thing about glaze is that it's workable for a little while. If you don't like it or not enough is coming off after you've wiped, use a damp cloth. That will take it almost all off! Apply more if needed and repeat the process! 
After it's all done, it will change the entire look of your piece! It will give it a nice aged look with lots of texture and depth! 
Good luck! 

~Amy 

Monday, April 29, 2013

Goodwill Cabinet!

I love when I go into Salvation Army or Goodwill and find GREAT pieces!!! I went into Goodwill over the weekend and saw this wood cabinet.  I was a little skeptical at first but for the price, I knew it should be mine!! It doesn't have any detail on it but I figured ANY color paint would look great on it!  

So I chose my handy dandy Annie Sloan Chalk Paint (ASCP) and went to work!  I chose 2 very popular colors, Paris Grey and Duck Egg Blue.  Everyone I know, LOVES Duck Egg Blue! 

The nice thing about the ASCP, is that you don't have to sand OR prime!!  It's a fabulous paint to for ANY project!  


 The Cabinet with a coat of Paris Grey

The paint dries pretty fast and within a couple hours, I painted the Duck Egg over the grey.  I love distressing and the ASCP makes it so easy to do it!  With a clean damp cloth, wipe off the areas of normal wear!  With a little elbow grease, the paint will come right off!  I particularly like where some of the grey comes through! For heavier distressing, use sandpaper or a sponge with that green rough side! 

 Clear Wax applied with a clean, lint free cloth.  Work in small areas and after you apply the wax, quickly wipe off excess!  Applying the dark wax works the same way.  If you feel like you have to much dark, take a little clear wax and "erase" those areas!  It takes a little practice to get the look you want! 
I actually didn't like the texture that I saw between the Duck Egg and the grey so I sanded the top and made it REAL smooth!  I like it much better now!!! 

This piece will look great in ANY space.  It has great storage space inside making it a MUST HAVE!!!


Friday, January 4, 2013

Dresser RE-DO for my laundry room

Another Great FIND!

I found this gem on Craigslist and had to have it! I have been looking for a unique piece to put in my laundry room.  I wanted something with some character and fun lines! This dresser has a curvy front and horizontal slats on the side, and little keyholes on each drawer.  I can't wait to paint this!!!

Using a DIY recipe for chalk paint, ( from iheartnaptime.net) I decided on Aspen Gray by Valspar. 


1st coat of chalk paint... I only sanded the top of the dresser and did not prime!  That's the beauty of the chalk paint!  


After the second coat is dried, the distressing begins!  This also de-stressing ME!  HAHA!!  


I wanted to try something new with this piece, so in the areas that I distressed the most, I applied a crackle medium.  Let that dry for a little more than an hour, then apply a coat of paint over it. Be careful though, brush the paint over the crackle medium only once.  More than one brush over with mess it up!  It only takes a few minutes and the crackle starts to show!  This is awesome!  And a word of advice from experience... if you applying the crackle to the side of something, make sure you put that side UP.  It will turn out so much better! 


Doesn't this look GREAT?!  
I love it.  
I haven't added the drawer pulls yet, but those will be spray painted black.  


Thursday, December 20, 2012

WINDOW FRAME MAKEOVER!

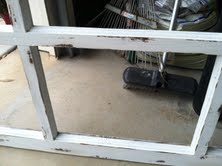
I bought about 5 of these HUGE window frames from someone on Craigslist who used them to display ornaments at the Christmas Show!


They have been sitting at my mom's house waiting for me to think of something to do with them!
After having a conversation with someone about decorating their mantel for christmas, I thought of these!  She has a huge stone fireplace and needed some decorating ideas! She needed something BIG that would stand out.  I immediately thought that THIS would be perfect!  After deciding on the color, I got to work!

I scraped and sanded a lot of the old paint off.  I didn't completely get it all off since I wanted an old, distressed look.  I wanted you to be able to see that there was some paint underneath.  The original latch was still in place as well as a sash on one side!  
There were some glass panes missing but I thought that just added to the character of this piece!

I used a antique white paint by Valspar and applied 2 coats.  After that dried, I went to work with sanding edges and corners.  I even scraped some of the paint back off in random areas.  This really gave it special touch!


To give it an even more distressed, old look, I used some glaze to fill in areas of scrapes and dents in the wood.  Glazing also catches in the corners and any grooves there are!  I love using this stuff.  You can get this at your local paint store.  I bought my mine at Lowes, and just choose the brown I wanted.  Basically, it's just watered down paint, which I might have to try and make myself next!  All you have to do is paint the glaze on, then using a clean, dry cloth, wipe off. Be careful not to wipe off completely in the corners or any of the places you want it to stick.  The glaze with "stain" the paint a little and give it a great look!
Valspar Signature
Tintable Glaze


I let the glaze sit for 24 hours then coated it with Polycrylic.

(I always have this on hand!)

The finished product after cleaning the glass, and decorating it up a little! I might just have to make one of these for me!!!