Showing posts with label antiqued. Show all posts

Wednesday, July 16, 2014

I love Glaze!!!

I am working on a coffee table today with a lot of detail so I thought it would be the perfect piece to show how to glaze!
 If you are using chalk paint, you would apply the glaze after clear waxing just like if you were using dark wax. 
If you are using latex paint or milk paint, you can glaze away without needing a clear coat first. Then after you are all glazed and dried, you should seal your piece! 
I painted 2 coats of a shade of white I bought at Lowes. Distressed all the edges! 
One of my favorite products is Valspar's Antiquing glaze in black. I paint it on using a chip brush working in small sections. 
Using a clean rag or paper towel, start wiping! The nice thing about glaze is that it's workable for a little while. If you don't like it or not enough is coming off after you've wiped, use a damp cloth. That will take it almost all off! Apply more if needed and repeat the process! 
After it's all done, it will change the entire look of your piece! It will give it a nice aged look with lots of texture and depth! 
Good luck! 

~Amy 

Friday, March 29, 2013

Vintage table

I bought this little gem on Craigslist!! I thought this would be a really fun piece to paint. I choose an Annie Sloan color- Florence. It's an awesome mixture of green and blue- sort of like a deep teal! Beautiful!!!

I cleaned up the table a little and fixed some of the cracked areas on the top with some wood filler. After that dried, I sanded and applied 2 coats of paint. This stuff goes on really easily and took me no time at all!!

Waxing comes after the paint has dried. I applied the clear wax first, doing small areas at a time. After you apply the wax, you have to buff it out which produces that nice little sheen finish!

Time for some distressing... I took my handy dandy 180 grit sandpaper and went to town! I did all the edges pretty heavily and did some areas along the sides! It's awesome!

I plan on going over the whole thing with the dark wax, same technique as the clear. The dark wax is awesome because it gives it more of an aged, antiqued look!!

Just have add some new funky hardware and we will be all set!!

This table is for sale!! $100


Tuesday, March 19, 2013

GOLD CHEST

 This was gonna be a fun project, I thought, as I checked this thing out!  It is GOLD... WOW!   And that's not a good WOW,  the gold paint even had little black specks in it.  UGH!!!  I couldn't wait to get my hands on this.  Since this was a metallic gold color, I needed to use a good primer.  I chose to use a spray primer because of all the intricate detail.  B-I-N Zinnser Shellac Primer is a fabulous product and it comes in a spray form... SCORE!!!  I used the entire can to ensure I coated this piece well!  

After coating with primer and letting it dry, I sprayed this piece using my handy dandy paint sprayer!  The color is an antique white, which is a slight off white.  

2 coats of paint and I used my brush for a 3rd coat on the top and a couple areas of the trim!


The paint has dried and is now ready for glazing!  Glazing will give this piece the antiqued, aged look it's screaming for!  The glaze with sit in ALL those cracks and crevices! Check out the difference in the drawers! The top one glazed and the bottom one is not.


Glazing is underway...

I lOVE how the the sides look!!!  I used a small paint brush and basically just painted around all the edges, let it dry slightly, then wiped away any of the excess. 

TEDIOUS TASK...  this is what took the longest!  But well worth it!


 After letting everything dry for at least 24 hours... time for a clear coat.  I usually use a Polycrylic and brush it on but again, this piece has SO much detail, I wanted to use a spray form.  Polycrylic has a spray in all 3 finishes... clear satin, semi-gloss, and gloss.
I personally like the satin since I don't like things too glossy!  


The clear coating has dried and it's time to attach the hardware.  This hardware is original to the piece and didn't need changing.  It went with the new look perfectly!  


I LOVE HOW THIS TURNED OUT!! and my customer was equally pleased!!!

What a difference!


Thursday, December 20, 2012

WINDOW FRAME MAKEOVER!

I bought about 5 of these HUGE window frames from someone on Craigslist who used them to display ornaments at the Christmas Show!


They have been sitting at my mom's house waiting for me to think of something to do with them!
After having a conversation with someone about decorating their mantel for christmas, I thought of these!  She has a huge stone fireplace and needed some decorating ideas! She needed something BIG that would stand out.  I immediately thought that THIS would be perfect!  After deciding on the color, I got to work!

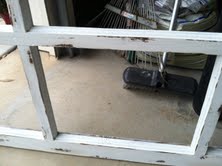
I scraped and sanded a lot of the old paint off.  I didn't completely get it all off since I wanted an old, distressed look.  I wanted you to be able to see that there was some paint underneath.  The original latch was still in place as well as a sash on one side!  
There were some glass panes missing but I thought that just added to the character of this piece!

I used a antique white paint by Valspar and applied 2 coats.  After that dried, I went to work with sanding edges and corners.  I even scraped some of the paint back off in random areas.  This really gave it special touch!


To give it an even more distressed, old look, I used some glaze to fill in areas of scrapes and dents in the wood.  Glazing also catches in the corners and any grooves there are!  I love using this stuff.  You can get this at your local paint store.  I bought my mine at Lowes, and just choose the brown I wanted.  Basically, it's just watered down paint, which I might have to try and make myself next!  All you have to do is paint the glaze on, then using a clean, dry cloth, wipe off. Be careful not to wipe off completely in the corners or any of the places you want it to stick.  The glaze with "stain" the paint a little and give it a great look!
Valspar Signature
Tintable Glaze


I let the glaze sit for 24 hours then coated it with Polycrylic.

(I always have this on hand!)

The finished product after cleaning the glass, and decorating it up a little! I might just have to make one of these for me!!!


Sunday, December 2, 2012

Salvation Army Rescue


I am so excited about my rescue from Salvation Army!!  I got this steal for only $40!  It was actually a real pretty piece as is, but the top needed a little help and the hardware had to go!  My intention all along was to paint it, but I had to figure out where in the house this would go because that would determine the color.  I didn't want to do black because I've already done that a few times and I wanted to try something different.  I wanted to try Annie Sloan's chalk paint since I've heard so many great things about it.  NO SANDING, NO PRIMING!!  That had me sold on trying it! 

I found a vendor that sold the good stuff and decided on my color.  I'm keeping this piece in my office where the walls are brown.  I have a rug that's brown with blue, gray swirls in it so I wanted a bluish color for the project! I chose the Duck Egg blue and bought both the clear and dark wax.  


THE BEFORE...
2 COATS OF DUCK EGG CHALK PAINT
SIDE VIEW- love the beadboard and scrolls on the side! 

As you may recall from the original photo, the two doors on the front have tin on them.  The paint just went right on and covered it beautifully!  No worries there.  This stuff sticks to ANYTHING!
The paint dries really fast, making this paint even better! 
I applied the clear wax in sections, using a clean, lint free cloth.  Apply in circles, just like waxing a car.  Once you do a small section, go back and buff the area.  That produces the nice sheen look!  It does take a while to do this step and you will get a arm, shoulder, and upper back workout as you do it!  BONUS!  

Apply the clear wax first then once that dries (24 hours later)  apply the dark wax.  The clear wax underneath makes the dark wax more workable.  Apply the dark wax in small sections as well, paying close attention to the little imperfections and dents in the wood.  The dark wax will make those areas more visible making it look more aged!  I love that!  I applied with dark wax with a small paint brush and just brushed it into the corners and across the surface. I used a little more in the corners to make it stand out. Using a clean, lint free cloth, wipe off the excess.   

If you have applied too much dark wax and it won't come off easily, use a little of the clear wax to "erase" it.  I did this on some of the flat surfaces like the top and fronts of the drawers.  I would recommend paying more attention to the corners and barely brushing across the flat surfaces.  You will brush the dark wax on then kind of spread it out with the cloth,  leaving more or less depending on the look you want!


After the dark wax had dried, ( a few hours) go back and buff all the surfaces with clean, dry cloth again, to make it a little shiny!  It will be beautiful.   

Now I have to find just the right hardware!!!
Happy Painting :-)

please feel free to comment with any questions you may have!  

I posted a link to Annie Sloan's website for a list of colors!
http://www.anniesloan.com/acatalog/paints.html

Tuesday, November 20, 2012

Guest Bathroom redo Part 1

Guest Bathroom Redo! 

This was one of the first projects I tackled when we moved into our new house!   I was so tired of looking at "builder grade" cabinets, mirrors, & countertops in the bathrooms.
So I had to do the easiest thing first... the cabinets! I had been experimenting with different kinds of paint.  I had previously used just regular latex paint, and now I wanted to try milk paint.  So out I went to get some black milk paint at a Woodcraft store in Matthews, NC.  
The paint went on pretty easily, had a flat finish, and left all the brush strokes.  Not to bad if you wanted that handpainted look, which I thought looked kind of old and vintage!  
                

I first sanded, primed, then painted 2 coats of black milk paint.  Then I had to distress all the corners and edges, to give it that aged look!  I focused a little more on the corners where it would normally be worn.  I didn't like the raw wood color coming through when I distressed, so I used a dark stain to those areas.  Now it looks great!  The last step was to clear coat the entire vanity.  I used Polycrylic satin finish to complete this look! 
Oh I almost forgot the most important part... I went to Target and bought a pack of these crystal knobs that make it look like a little antique cabinet and not just an ugly old plain vanity!
A Must have!
Stay tuned for the mirror redo...  I am working on that now and will post pics as soon as it complete!