Showing posts with label paint sprayer. Show all posts

Wednesday, May 29, 2013

Aldyn's kitchen

I've started another cabinet job and this one is desperately needed! Very dark wood, dark floors, dark wood moldings! We are gonna lighten the cabinets up with some antique white and brown glaze for a antiqued look! The room is already lightened up with just the primer!!  


THE WALLPAPER IS ALSO IN THE PROCESS OF BEING REMOVED!!


Prep work is the most important step...without it your paint will NOT stick!  SO be sure to properly clean to remove all grease and grime! Paint won't stick to that!  Sand surfaces to scuff them up a bit, or use a deglosser.  Choose a good primer. I tend to use a oil based primer or a shellac based primer to assure your paint adheres!! After priming is dried, you have to sand them down again lightly just to smooth them out.  You don't want rough surfaces, so the key is to SAND, SAND, SAND!!!
Now I am ready to paint!


Below is the cabinets just about done! All the doors are attached and the glazing complete!  Beadboard is being added to the ends of the cabinets to give it a more custom look!! Those will be glazed as well! Sorry about the quality of these pics... they were taken with my phone.  Better pics will be posted.  I was just excited about this transformation!  And as you can see, the wallpaper is down! woohoo! I can't wait to see this kitchen after the walls are painted.  


check out the before and after!!! 


Products I used...


Tuesday, March 19, 2013

GOLD CHEST

 This was gonna be a fun project, I thought, as I checked this thing out!  It is GOLD... WOW!   And that's not a good WOW,  the gold paint even had little black specks in it.  UGH!!!  I couldn't wait to get my hands on this.  Since this was a metallic gold color, I needed to use a good primer.  I chose to use a spray primer because of all the intricate detail.  B-I-N Zinnser Shellac Primer is a fabulous product and it comes in a spray form... SCORE!!!  I used the entire can to ensure I coated this piece well!  

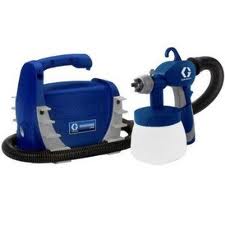
After coating with primer and letting it dry, I sprayed this piece using my handy dandy paint sprayer!  The color is an antique white, which is a slight off white.  

2 coats of paint and I used my brush for a 3rd coat on the top and a couple areas of the trim!


The paint has dried and is now ready for glazing!  Glazing will give this piece the antiqued, aged look it's screaming for!  The glaze with sit in ALL those cracks and crevices! Check out the difference in the drawers! The top one glazed and the bottom one is not.


Glazing is underway...

I lOVE how the the sides look!!!  I used a small paint brush and basically just painted around all the edges, let it dry slightly, then wiped away any of the excess. 

TEDIOUS TASK...  this is what took the longest!  But well worth it!


 After letting everything dry for at least 24 hours... time for a clear coat.  I usually use a Polycrylic and brush it on but again, this piece has SO much detail, I wanted to use a spray form.  Polycrylic has a spray in all 3 finishes... clear satin, semi-gloss, and gloss.
I personally like the satin since I don't like things too glossy!  


The clear coating has dried and it's time to attach the hardware.  This hardware is original to the piece and didn't need changing.  It went with the new look perfectly!  


I LOVE HOW THIS TURNED OUT!! and my customer was equally pleased!!!

What a difference!